If your Tesla is not recognizing objects correctly, if it appears to be performing abnormally, or if you're receiving errors related to your cameras or Autopilot, you may want to calibrate your vehicle's cameras.
The process may take a while to complete, but it's quick and easy to begin.
The cabin camera does not directly impact Autopilot’s performance while engaged. Instead, it’s solely used to help monitor the driver and confirm that they're paying attention while Autopilot is engaged.
Tesla initially equipped its vehicles with ultrasonic sensors, but the Austin-based automotive company is transitioning its vehicles to leverage Tesla Vision exclusively. In 2022 Tesla begin to omit ultrasonic sensors entirely and now uses the vehicle’s cameras exclusively.
How to Calibrate Your Tesla’s Cameras
To calibrate your vehicle's cameras, follow the steps below. Keep in mind that although you can drive your vehicle immediately after performing these steps, some features that depend on the vehicle's cameras will not be available until after calibration is completed.
Go to “Controls” (the car icon)
Tap “Service”
Tap “Camera Calibration”
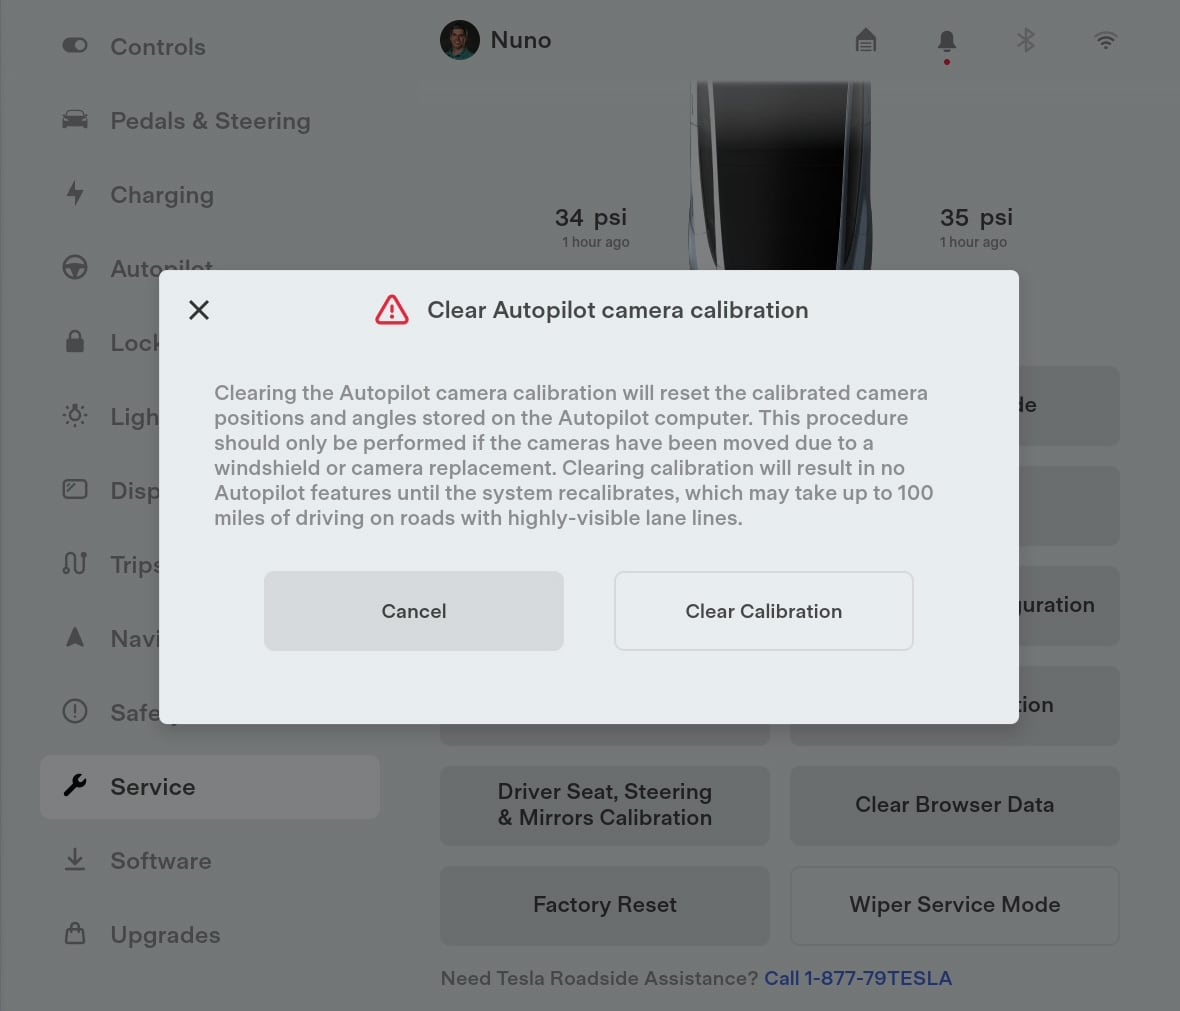
Once you’ve tapped “Camera Calibration,” a warning message will pop up with the following text:
“Clearing the Autopilot camera calibration will reset the calibrated camera positions and angles stored on the Autopilot computer. This procedure should only be performed if the cameras have been moved due to a windshield or camera replacement. Clearing calibration will result in no Autopilot features until the system recalibrates, which may take up to 100 miles of driving on roads with highly-visible lane lines.”
When you’re ready, tap “Clear Calibration.”
Note: If possible, drive on a long straight road with multiple lanes (like a controlled-access highway) with easily visible lane markings for quicker and more accurate calibration. According to Tesla, “Clear Calibration may not resolve all camera and sensor concerns.”
How Long Does It Take to Calibrate the Cameras?
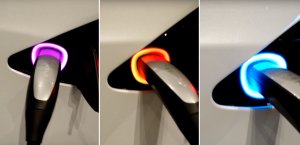
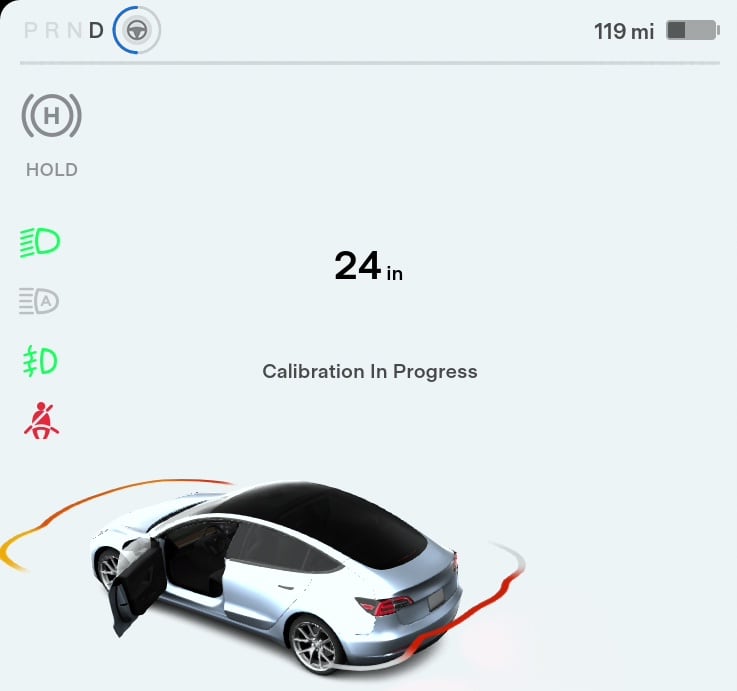
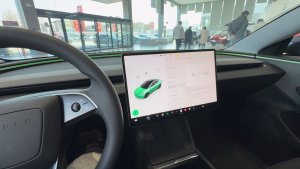
The blue ring around the Autopilot icon will show you the progress of your camera calibration
Not a Tesla App
First, you will not be able to use Full Self-Driving, Enhanced Autopilot, or Basic Autopilot. These will all be disabled while the cameras are recalibrated.
The steering wheel icon that previously showed whether Autopilot was engaged will now show a blue ring. As the vehicle gathers data and the software adjusts, the ring will adjust to show the calibration progress. Although it may take up to 100 miles of driving to calibrate your cameras, it's usually much quicker. To be safe, you should plan for the calibration process to take 2-3 hours of driving to complete.
Camera Calibration Stuck at 99%
The ring may get to 99% complete and then get 'stuck.' This is normal. Be patient and allow the car to complete the process. It will resolve itself and the vehicle will notify you when calibration is complete.
If after a few drives and more than 100 miles the recalibration is still stuck, contact Tesla to set up a service appointment. They’ll be able to determine whether the issue is software or hardware-related. Tesla may be able to diagnose your vehicle remotely and push an update to help fix any issues.
Why Do Cameras Need to be Calibrated?
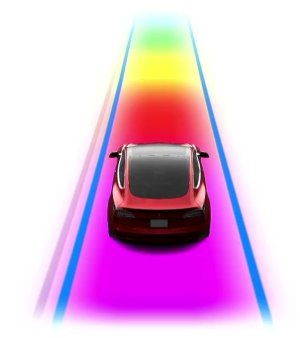
The cameras placed strategically around the vehicle need to be aligned perfectly in order to function properly. Each video feed from the cameras is joined together to form a 360-degree view of the vehicle’s environment. If there's a gap between cameras or an extension overlap, it could cause the vehicle to not see certain areas or see "double." It’s like taking multiple pictures with your phone and then stitching them together. It’s how astronomers edit and stitch pictures together from the James Webb Space Telescope.
The calibration process doesn't actually move the cameras, but instead, it crops and adjusts each camera's feed so that the vehicle sees a single unified image. That’s why the slightest millimeter of miscalibration could cause issues.
What Does Recalibrating Tesla’s Cameras Fix?
Recalibrating the cameras in your Tesla may fix a number of things, including phantom braking, inability to properly detect surrounding objects, Autopilot faults, and various error messages.
Tesla states in their Model 3 instruction manual that a few limitations may cause Autopilot’s functionality to be limited. They include:
Poor visibility (due to heavy rain, snow, fog, etc.).
Bright light (due to oncoming headlights, direct sunlight, etc.).
Damage or obstructions caused by mud, ice, snow, etc.
Interference or obstruction by object(s) mounted onto the vehicle (such as a bike rack).
Obstruction caused by applying excessive paint or adhesive products (such as wraps, stickers, rubber coating, etc.) onto the vehicle.
Narrow or winding roads.
A damaged or misaligned body panel.
Use of gray or aftermarket glass.
Interference from other equipment that generates ultrasonic waves.
Extremely hot or cold temperatures.
If you've just received delivery of your Tesla, your vehicle may still be calibrating its cameras. Look for the blue ring around the Autopilot icon to see if your vehicle is still calibrating its cameras.
Hopefully, after recalibrating your cameras, the issues you were experiencing are fixed. Although recalibrating your cameras does not fix all issues, it's usually a good first step to try.
As always, if you continue to experience issues, you should schedule an appointment with Tesla service through the Tesla app.
Subscribe
Subscribe to our newsletter to stay up to date on the latest Tesla news, upcoming features and software updates.
Every Tesla has a frunk storage – and people use them for everything under the sun. But it's not about the sun today, but rather what’s under the pumpkin moon.
Let’s take a look at some of the best Frunk (or Trunk) or Treat ideas we’ve seen in previous years and maybe they’ll inspire you.
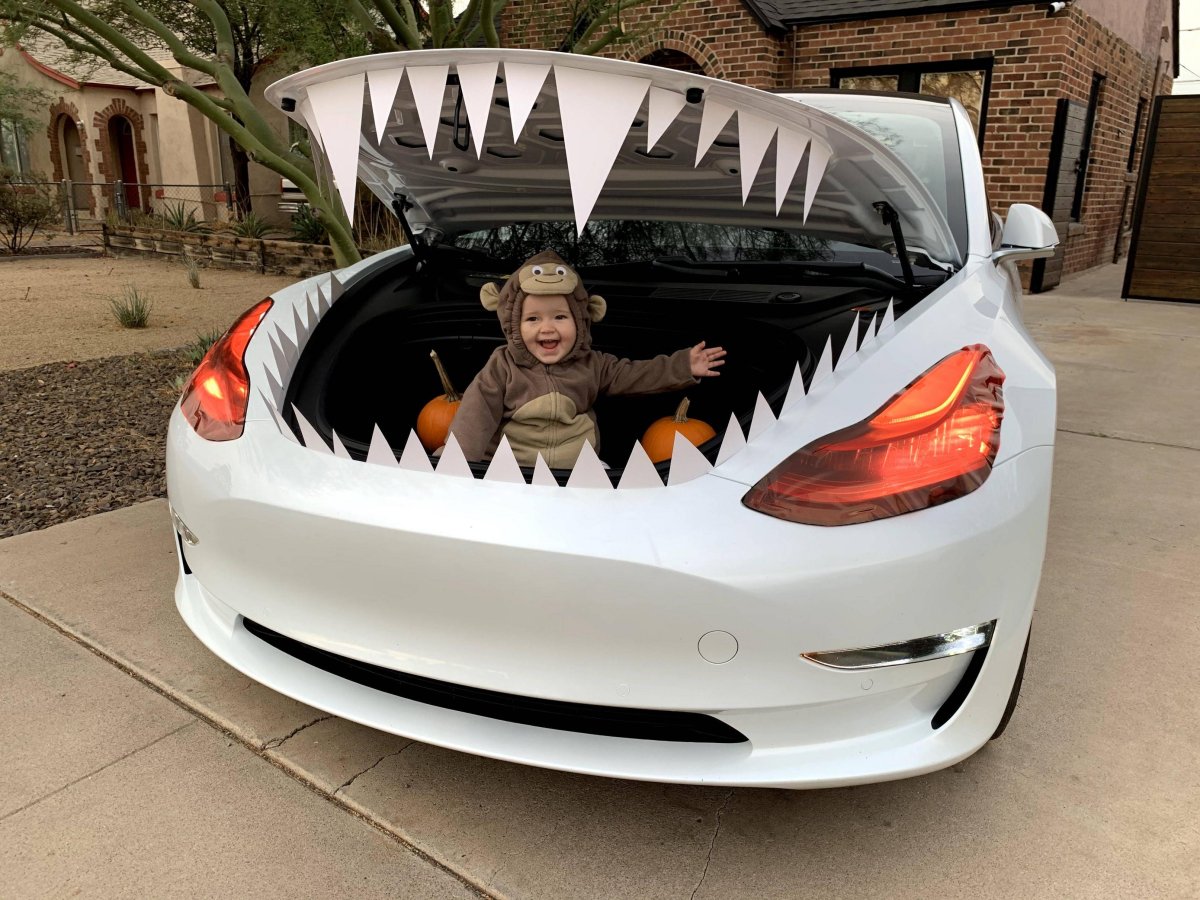
Jaws
One of the easiest things to do is to turn your car into a shark with some nice and spikey teeth. Chrisheninger on Reddit dresses up his Tesla with Shark teeth every year, and parks it out front for the trick-or-treaters! Take a look at the hero image above for a preview!
And it's pretty easy to do too – you just need some white posterboard, tape, and a pair of scissors to get started. Fold the posterboard in half, then cut it into triangles of various sizes. Tape your triangles to the top and bottom of the frunk, and voila! Jaws!
For the bottom side, you can wedge the teeth into the gap between the body and the frunk, so you may not need tape there.
You can also get some clear cellophane tape and cover up the headlights to give them a nice orange or red glow.
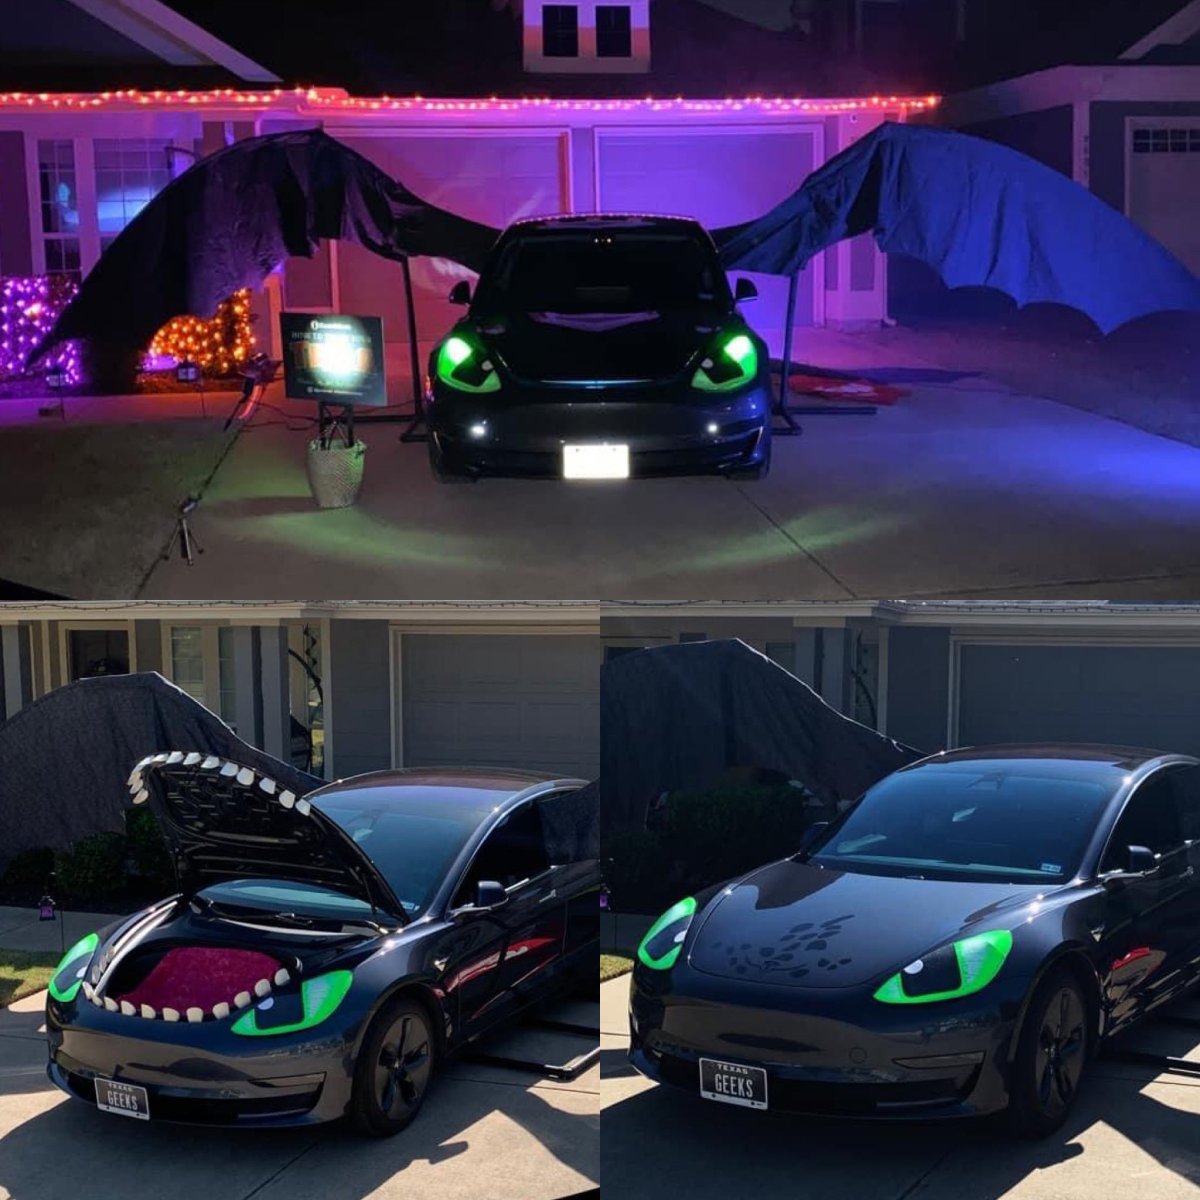
Toothless
This one is a bit of a bigger project. @jenstreet over on X posted an absolutely spectacular job of turning their Tesla into Toothless, from How to Train Your Dragon! We’re not going to get into how to do this – instead, Jen posted her own guide on how they did the project. Props to them for the very detailed instructions!
This is an absolutely spectacular way to showcase your creativity! You can read their guide here.
Jen's Toothless Tesla Dragon
jenstreet
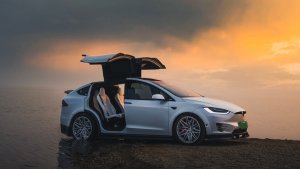
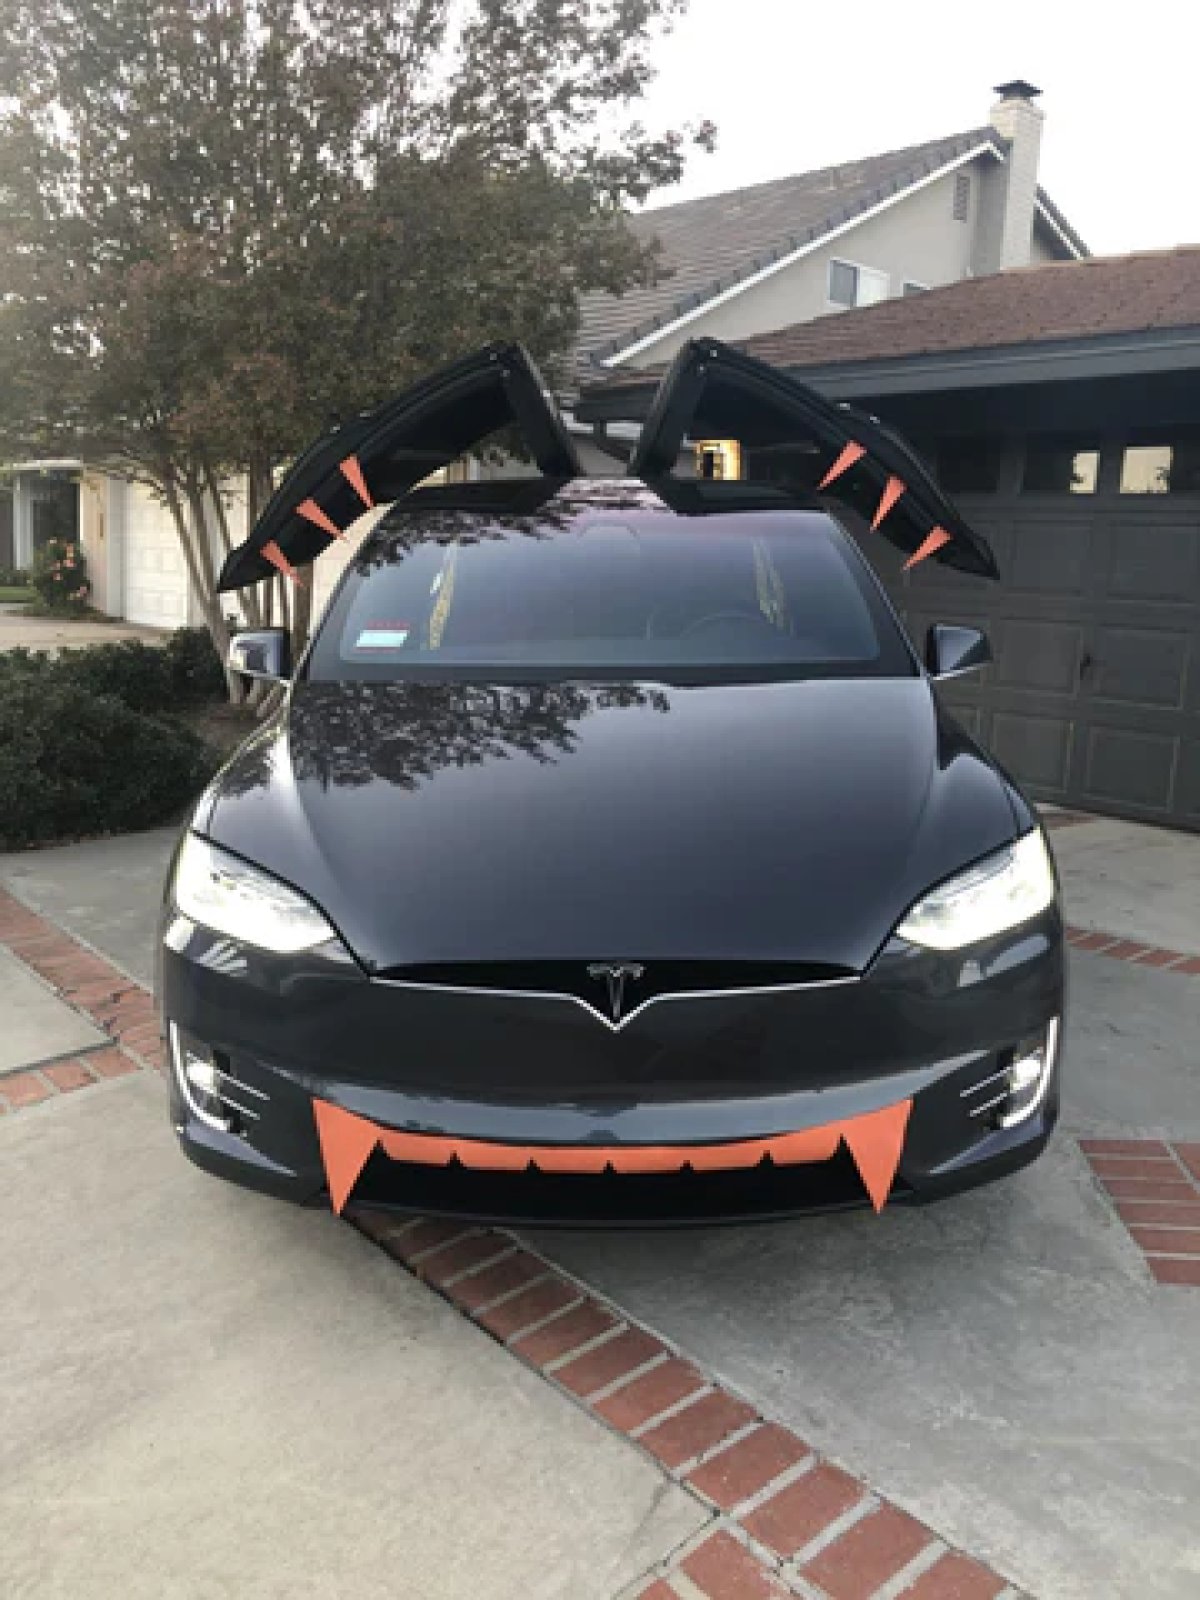
Model X Vampire Bat
A Vampire Bat Model X
Not a Tesla App
If you’re a creative Model X owner, you can turn your Model X into a vampire bat! All it takes is a few pieces of cardboard for the teeth, like with the Jaws decoration above. While in the example below, the enterprising user placed more teeth on the gullwing doors of the Model X, we recommend draping a few black sheets from the gullwing doors to complete the look, especially if you tear them up at the ends a bit.
Combine this with a well-thought-out Tesla Lightshow (more on this later), and you’ve got a seriously cool-looking vampiric Model X in your driveway.
Other Ideas
Not a Tesla App
You can always use the frunk in other unique ways too – there’s quite a bit of space in there. Put in a decorative gravestone or ghost or cover it up in decorative spider webbing. You can do pretty much whatever your heart desires with the frunk. You can even put in some battery-powered lighting and fog generator and give it an ominous glow.
If you’ve got an older Model S or Model X with a nosecone, there are some unique ideas you can use that for too – including short teeth with googly eyes on the hood. Less scary, but definitely still fun!
Lightning McQueen
Not a Tesla App
Here’s a great and simple one if you have a red Tesla — Lightning McQueen. It can be as simple as buying a Lightning McQueen sunshade and sticking in your car, or as elaborate as S.E. Robinson Jr.’s creation on X. Although there hasn’t been a new Cars movie since 2017, these movies are still insanely popular with young kids.
SERobinsonJr
Boombox
Using the Boombox feature on your Tesla, combined with keeping it turned on through Camp Mode, will allow you to play all the creepy Halloween music you want to get the atmosphere just right. Maybe throw in a fog generator somewhere, and you’ll have one of the best Halloween attractions on the block!
p1ngz
Lightshow
You can use Tesla’s Lightshow functionality to take it a step further and sync the music and lights of your car – and if you’ve got a Model X – the gullwing doors too! That’ll really complete the entire Halloween ensemble.
Sadly, there is one catch with this one – you’ll need to keep re-enabling the Lightshow manually from inside the vehicle. Tesla has not yet released functionality for Lightshows to be played remotely from the Tesla app.
I wonder what we’re going to see for this year’s Frunk or Treat? Personally, I have a few things planned for this year, and this is also the first year we’ll see Cybertrucks participating. We’re excited to see what people do with the Cybertruck’s huge and automated frunk and unique shape.
Given the Cybertruck’s frunk also has 120V power in it, there are even more unique and interesting things one can do.
October 10th was Tesla’s spectacular ‘We, Robot’ robotaxi event, and now we know a lot more about Tesla’s upcoming robotaxi – officially named the Cybercab – than ever before.
So, grab your Tesla-stamped BBQ burgers and put on your 12 gallon hat, we’re going to take a look at everything we know about Tesla’s Cybercab.
Exterior
Not a Tesla App
The Cybercab showed up to ‘We, Robot’ with both a front and rear lightbar, similar to the Cybertruck. However, unlike the truck – it’s not stainless steel. Instead, the prototypes that were at the robotaxi event arrived with aluminum body panels painted silver.
While the exterior finish won’t be as tough-as-nails as the Cybertruck, the Cybercab is designed to be cheaply mass-produced, so this decision makes sense. While there was early talk about using a stainless steel “exoskeleton,” it appears Tesla decided that aluminum and steel body panels would be easier and/or cheaper to manufacture.
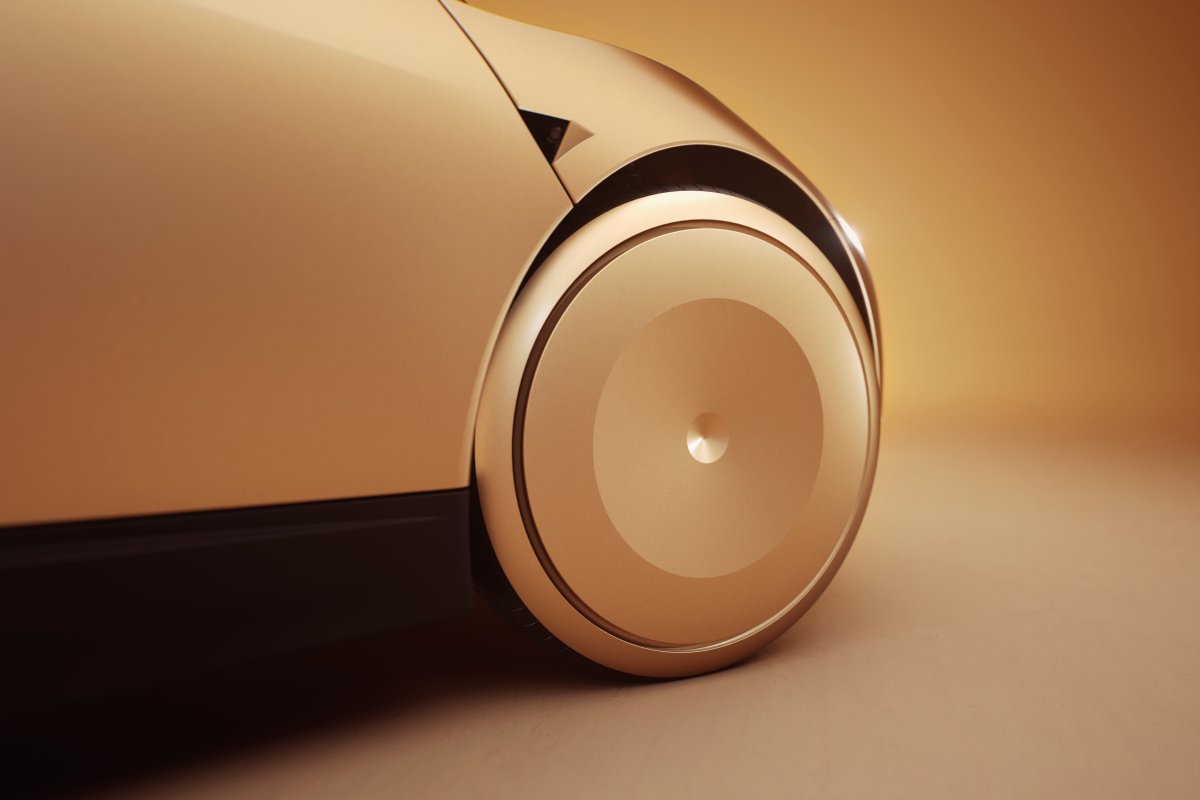
While many initial concepts thought the Cybercab may only include three wheels, it does indeed have four wheels like a normal car.
And of those four, only the front two did the steering – so no rear-wheel steering here. Speaking of the wheels, they were mostly covered up with a disc-shaped plate, making them extremely aerodynamic. Tesla also painted the sidewalls of the tires silver, leaving them looking super slim in comparison to the size of the wheel.
Looking at the whole vehicle, the Cybercab doesn’t have Tesla’s iconic glass roof – but a simpler metal roof. The windows are not frameless either – they are framed (metal around the glass opening), which makes them easier to maintain and produce. All these changes are clearly aimed at reducing the overall cost of the vehicle, fitting its robotic taxi role.
Not a Tesla App
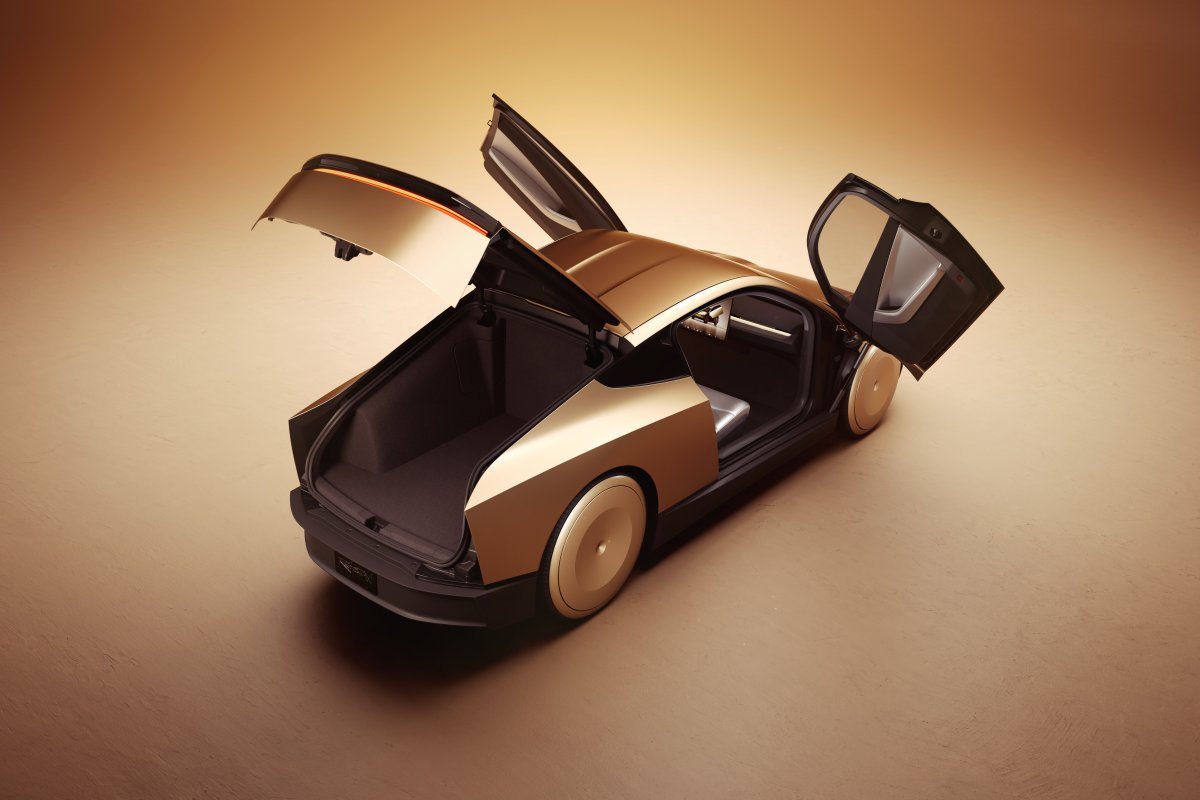
The one oddball in terms of price-to-function ratio is the butterfly doors. Cybercab’s butterfly doors are super impressive – and strike a pose just as iconically as the Model X. We’re interested to see what Tesla has planned for these automatic doors – as they may be difficult to maintain and service in colder climates given snow and ice build-up.
Interior
On the interior, the Cybercab comfortably seats two adults with large, padded seats. In these prototype vehicles, the seats are not ventilated, but they are heated. The seats themselves were fairly simple in comparison to Tesla’s other seat designs, even when compared to the simpler Mexican Model 3 with its fabric seats.
Tesla has made the overall interior design very simplistic and easy to clean. They showed off a new automatic vacuum and scrubbing unit that was cleaning the robotaxi’s seats and screens – so these seats are likely intended to take some punishment. And the screen will likely need to be cleaned often. There were no other major controls in the vehicle to clean – no steering wheel, no pedals.
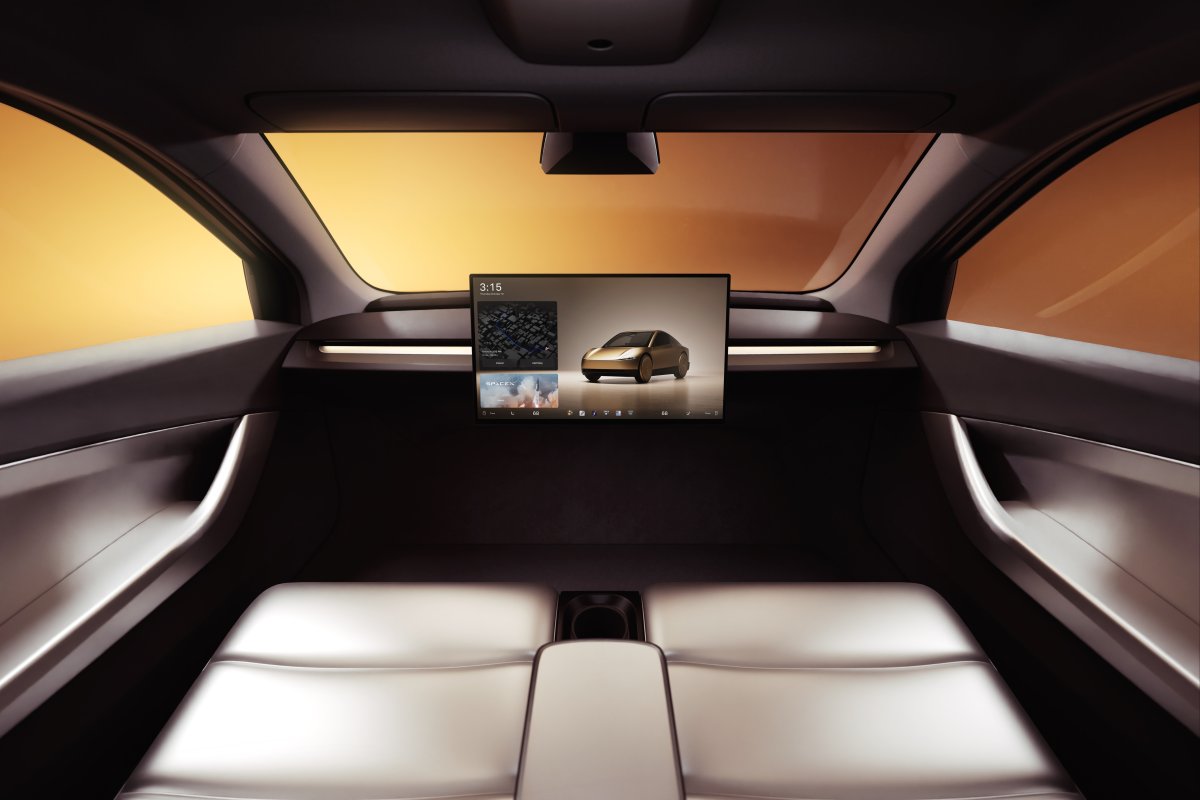
However, the interior is classic Tesla—super spartan, stylish, and clean, with an extremely large 20.5” center display intended to display trip progress and entertainment. In comparison, the Cybertruck currently has the largest display in any Tesla, with an 18.5” screen. The Model 3 and Model Y use a 15” screen. Unsurprisingly, it looked like both video games and movies and TV shows would be available in the Cybercab.
Not a Tesla App
Two drink holders are also located just in front and below the center armrest. Just under the drink holders (towards the passengers) are the buttons to open and close the doors. The doors normally close automatically when the passenger(s) buckle up, but they can also be closed manually.
As expected, the controls for the windows are on the doors, so nothing too special there. Tesla has only shown the white interior so far, with black trim throughout the interior, including the carpet floor and plastic headliner. We’re hoping that Tesla also introduces a black interior – even with how resilient Tesla’s whites are – a black interior is likely to better last through the day-to-day punishment a taxi goes through.
FSD Hardware/AI
At the event, Elon Musk confirmed that Cybercab would be shipping with an “upsized” Hardware 5/AI 5. It looks like AI5 has mostly the same camera layout as AI4—with two (+1 fake) cameras at the top of the windshield. The car also features a front bumper camera, the usual two B-pillar cameras, and one rear-facing camera.
The Cybercab's rear end has a fairly large amount of storage—the rear hatch opens upwards and reveals a sizeable cavity. From some rough estimates, it will be possible to comfortably throw 3-4 large suitcases back there, along with a few other items.
Internally, there’s less space, but as there is no center storage console, there is a large amount of legroom. If you potentially needed extra space, you could put a backpack on the floor of the Cybercab between your feet, and still have plenty of space to stretch.
Release Date
Elon acknowledged he’s been overly optimistic about timelines and relented that production for Cybercab should begin no later than 2027. However, he did mention 2026 as a likely start date.
Now that the Cybercab has been unveiled, we’ll likely start seeing design and build prototypes on the roads in Texas and California – where Tesla plans to start Unsupervised FSD – sometime in late 2026. More vehicles will show up in 2027.
Price
In a somewhat surprising move, Tesla announced that they’ll also sell the Cybercab to anyone who wants to buy it, whether it’s for personal use or to operate their own fleet of autonomous taxis. Tesla announced that they plan to sell the Cybercab for under $30,000 USD. Given the lack of steering wheel and pedals, we’re not sure whether the US Federal EV Rebate or the Canadian iZEV rebates would be applicable to these Cybercabs, but we’ll see how that pans out in the future. Both of these rebate programs are set to expire before the Cybercab hits the road.
Cybercab Hubs – Cleaning & Charging
Elon also confirmed that the Cybercab has inductive charging – a first for a fleet-scale EV. It seems that Cybercabs will likely belong to “hubs” where they can be charged and get cleaned. Whether these hubs are Tesla-owned facilities or consumer-owned is yet to be determined.
Not a Tesla App
Tesla also showed off a very short clip of the Cybercab getting cleaned with robotic arms. The cost and complexity of this are likely to drive a model where Tesla provides the facilities for charging and cleaning while owners simply let their vehicles be charged or cleaned as required.
We’re excited to hear more details about how exactly Tesla intends to build out these potential hubs and more details about the upcoming Cybercab. Now that the event has passed, we should start to see a steady flow of new information as Elon or other Tesla executives share new details.


![Tesla 'We, Robot' Robotaxi Event: How and Where to Watch [Updated]](https://www.notateslaapp.com/img/containers/article_images/robotaxi/wb_discovery_robotaxi.jpg/7c05b7e946978dcae966bfa0689dd5ff/wb_discovery_robotaxi.jpg)

![Tesla Says 12V Power Socket Access Will Not Return With Sentry Mode [Rumor: Enable With Waiver?]](https://www.notateslaapp.com/img/containers/article_images/model-x/0x0-model-x_15.jpg/4f50cdca661289512fdff36a05086b99/0x0-model-x_15.jpg)

![Tesla FSD V12.5.6 Introduces Major Improvements: A Look at All the Changes [Photos]](https://www.notateslaapp.com/img/containers/article_images/2024/hurry_highway.jpg/11a9f5a751caff40cfc39bd8b1b0f6e1/hurry_highway.jpg)
![Tesla Vision-Based Monitoring Appears to be Live in Europe [VIDEO]](https://www.notateslaapp.com/img/containers/article_images/2021/cabin-camera.jpg/ede3af25904230703ab0f29a9ec98af3.jpg)