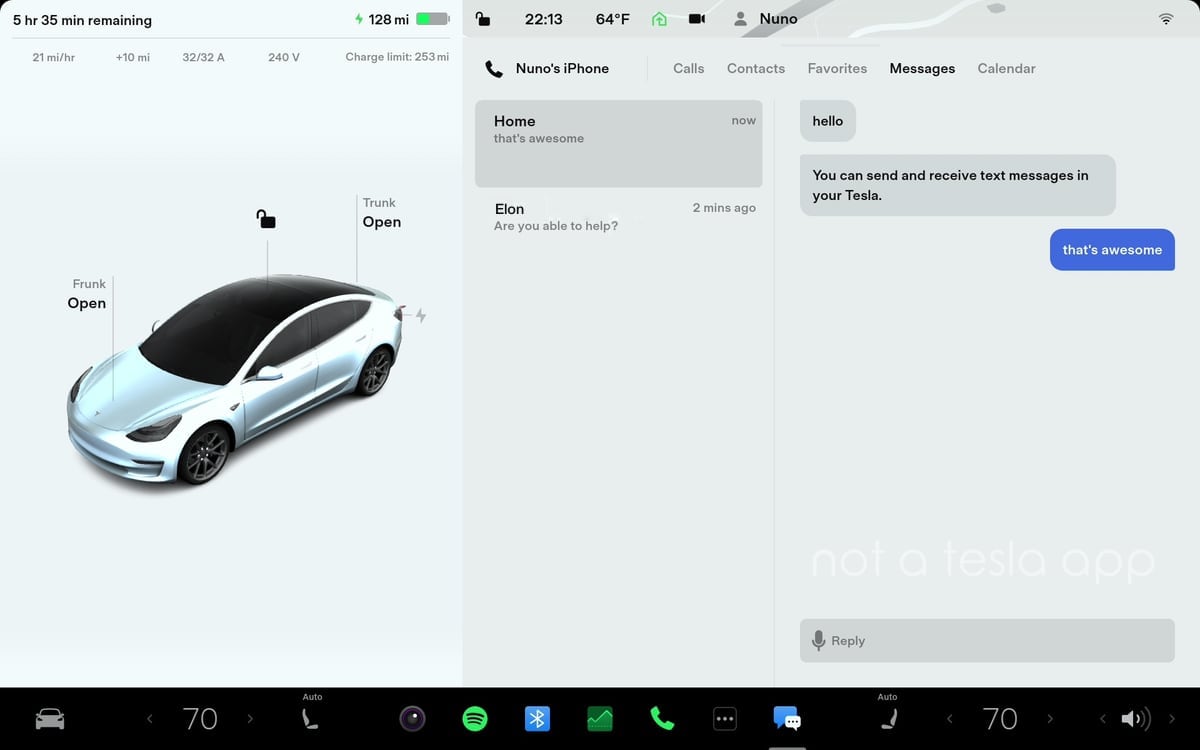
Teslas have the ability to send and receive text messages. Any message you receive while connected to the car will display the sender's name on the screen. You can then have the car read the message to you or dismiss it.
Being able to receive text messages is as simple as pairing your phone and turning on a few settings. If you’d like to reply or send a text message, you can do it completely through your voice.
How to Set Up Text Messaging
How to set up text messaging in your Tesla
Not a Tesla App
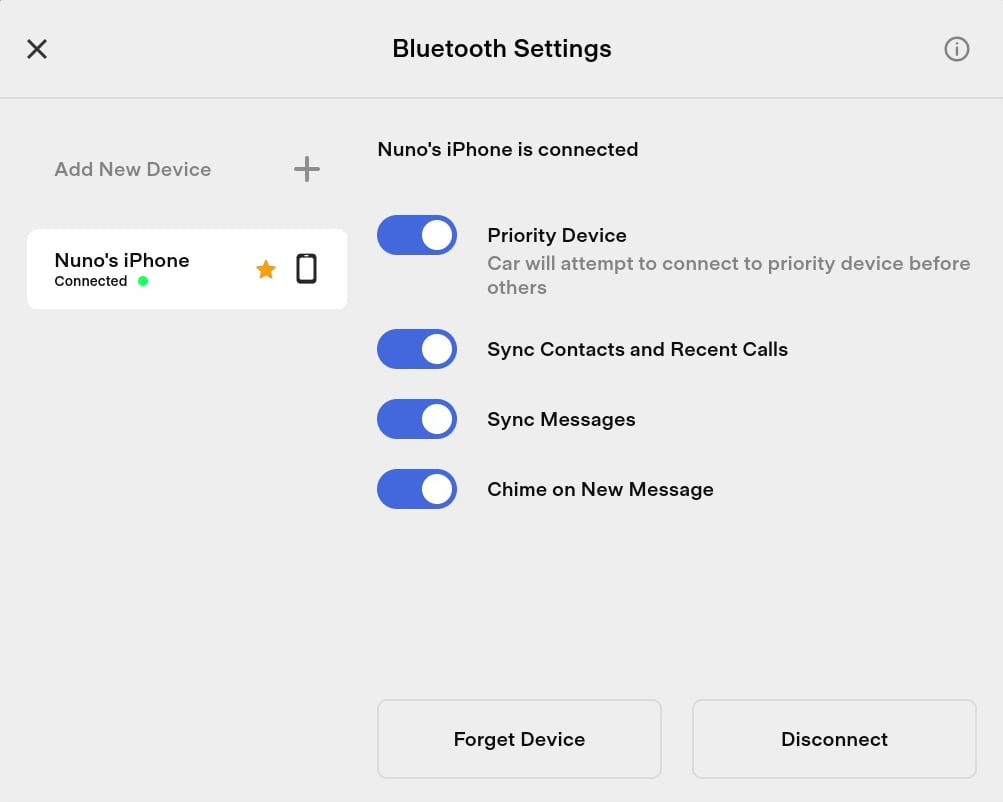
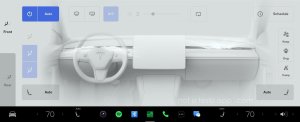
Tap the Bluetooth icon at the top of the screen to go to Bluetooth settings.
You’ll see a list of phones and devices paired to your car. You’ll want to pair your phone now if you haven’t done so already.
You’ll need to make sure the phone you’re setting up messaging for is already connected. Then tap the name of your device on the left side.
You’ll see options for that device on the right side. You will want to have the “Sync Messages,” option turned on. It may also want to turn on the “Chime on New Message” option if you’d like the car to have an audible alert every time you receive a new message. If you leave this option off, the car will still display a notification on the car’s screen, but without a chime.
How to Send a Text Message
The only way to send a text message through your Tesla is using your voice.
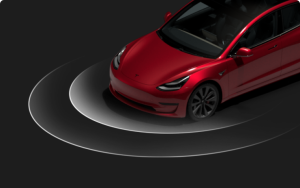
Your Tesla will read incoming text messages and allow you to respond
Not a Tesla App
On a Model S or Model X, tap the voice button on the top right side of the steering wheel.
On a Model 3 or Model Y, push in the right scroll wheel to start a voice command.
Then use the voice command, “Send text to Name”, Name being the person in your phone’s contacts that you’d like the message to be sent to. You’ll need to have your contacts synced to your car in order for this to function.
If you’d like to send or view text messages already sent during your trip. You can tap the Apps button (denoted by a ^) and choose Phone. From there tap the Messages tab and you'll see a list of all the contacts and messages you have sent and received during this trip. Messages already on your phone or sent in a previous drive will not show up here.
How to Receive a Text Message
Your Tesla will display and read incoming text messages
Not a Tesla App
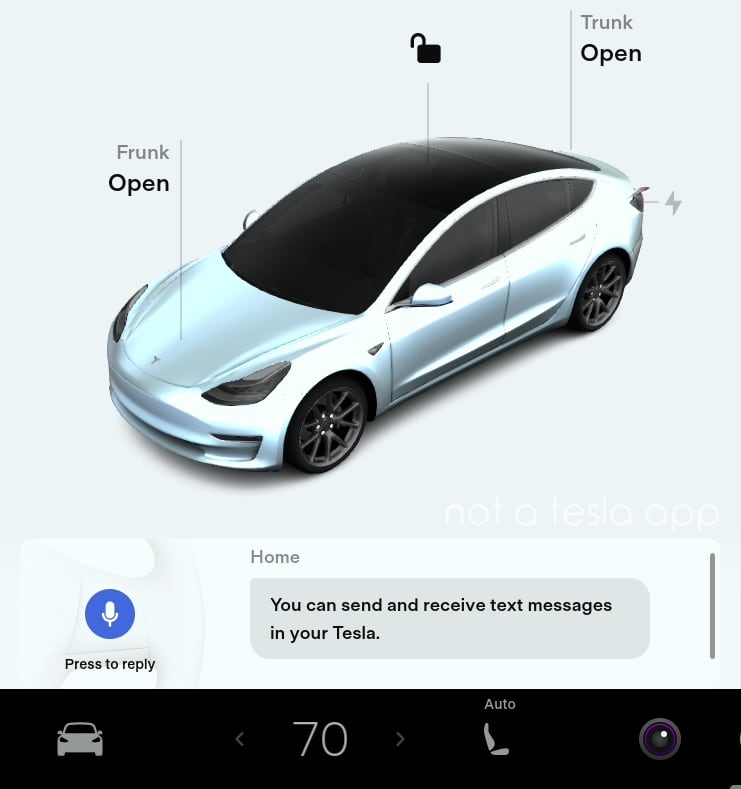
If your phone is connected via Bluetooth and you have the sync messages option turned on, you’ll now receive an alert every time you receive a text message.
You’ll hear a ding and the alert will appear on the screen along with the sender’s name. The message will be obscured until you choose it to be shown and read.
Model 3 or Model Y
To view a text message and have the car read the message to you, press the right scroll wheel.
To dismiss a message, you can press the right scroll wheel twice.
To dictate a reply, you press the right scroll wheel once, followed by your reply. Once you're done, you can press the right scroll wheel again to send the message.
Model S or Model X
On the instrument cluster you will see different options that you can select with the scroll wheel and the select button that will let you view, reply or dismiss the text message.
Tips
Car doesn't recognize a name
If the car has a hard time recognizing a name in your phonebook, there are a couple things you can do. You can duplicate the contact on your phone, giving the second contact a name that the car will recognize. Alternatively, you can favorite the contact. By favoriting a contact you'll be able to easily start a text message with them by going to Apps (the ^ icon ), Phone and then Favorites. Each favorite or contact has a Call icon next to their name along with a Message icon that you can use to start a new conversation.
Re-dictate a message
If you have a Model 3 or Model Y, and you reply to someone, only to have the car not understand what you said, you can dictate your message again by pressing the right scroll wheel in twice. On a Model S or Model X, you have a selectable option to let you re-try dictating the message.
Stop reading a message
If the car is reading a long text message and you'd like to stop it, you can press the right scroll wheel two times to dismiss the message.
Playback volume
Although it would be a great feature, there is currently no way to adjust the volume at which text messages are read.
Troubleshooting
If you’re not receiving text messaging in the car you will want to confirm that your phone is paired and connected. You’ll also want to confirm that the ‘Sync Messages’ option is turned on in the car's Bluetooth settings.
You'll also want to check your phone's Bluetooth settings to make sure the phone is sharing the relevant data with the car. You'll want to go to Bluetooth settings and find your device which you're connecting to, which is the car in this case. It should be labeled as Tesla followed by the model and the name of your car. Then you can tap on the ( i ) icon for iPhone's or the gear icon for Android and you should see device specific settings. You will want to be sure that the car is sharing contacts and notification or text message data with the car.
If you’re still having trouble, you may want to try rebooting your car. If it still doesn't work, you can try unpairing the phone and repairing it again. Delete the device from the car's Bluetooth settings and also delete the car from your phone's Bluetooth settings. You can then repair and enable text messaging again.
Keep in mind that sending group messages or replying to group messages is not currently supported on some devices, including iPhones.
Subscribe
Subscribe to our newsletter to stay up to date on the latest Tesla news, upcoming features and software updates.
Tesla has been quietly building something pretty unique on the streets of Hollywood—and we’ve been keeping a close eye on it. That’s right: the long-anticipated Tesla Hollywood Drive-In, Diner, and Supercharger is shaping up to be one of the most creative approaches to EV charging yet.
But this isn’t your average Supercharger site. It features a retro-futuristic, 24-hour diner and an outdoor movie theater, blending the charm of the 1980s with the tech-forward vibe of the 2020s.
Tesla hacker Greentheonly managed to spot some new evidence of changes within Tesla’s 2025.8.6 software build, which includes a new modal for “Charger Diner Controls”. While there isn’t anything to activate this new modal just yet, it is an indication of how Tesla intends to integrate the experience right into each and every Tesla.
The text in the modal reads: “Plug in, place your order, recharge” - which means that once you arrive and are plugged in, you’ll be able to place your order - and likely pay through Tesla’s payment system. It seems like this will all be done through either the Tesla app or the vehicle’s tocuh screen. No need to fumble with a separate app or pull out your wallet.
This is definitely a level of integration you just can’t have anywhere else - and just like any other Supercharger site, the Tesla Diner will appear as a suggested site for charging when you’re navigating or looking around the Hollywood area.
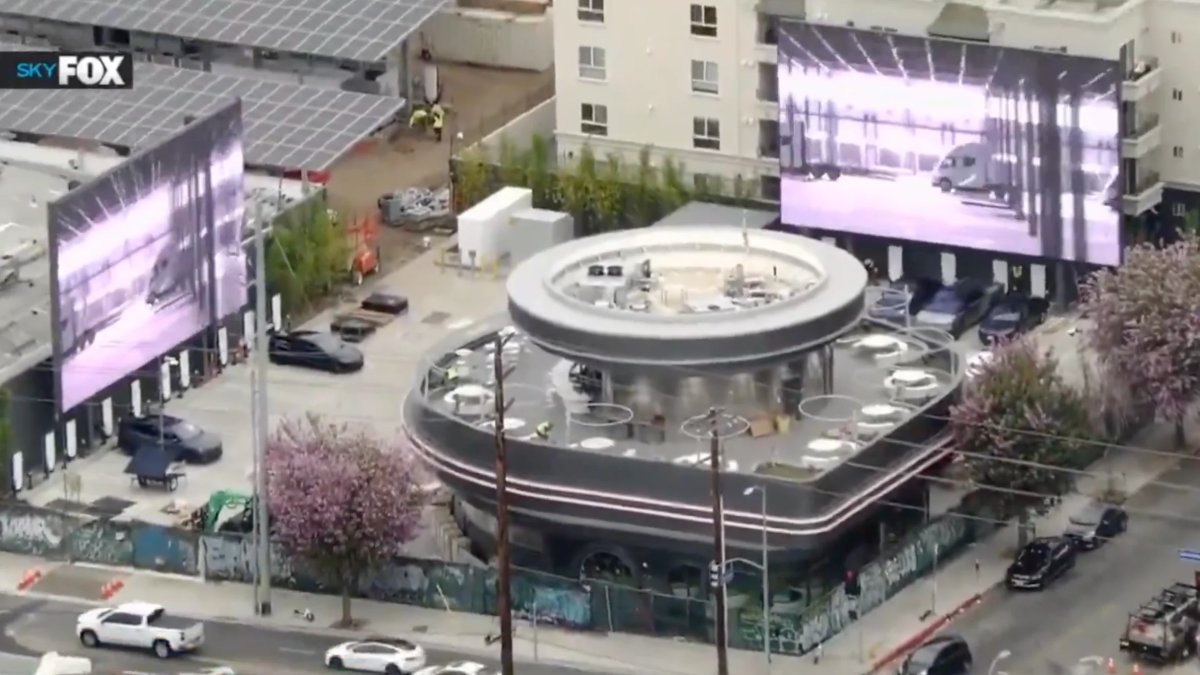
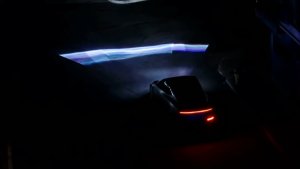
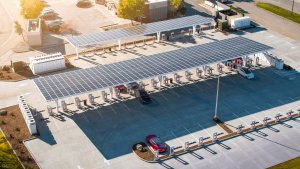
This is our best look yet at the two 45-foot LED screens at @Tesla's upcoming Hollywood diner and Supercharger.
We can also see the second Supercharger lot on the left with solar canopies. This will be one of the largest Supercharging spots in North America. pic.twitter.com/aWUe67M5vw
Those two absolutely gigantic 45-foot LED screens have now been turned on for the first time, meaning that Tesla is likely close to opening the Supercharger site. The screens were spotted displaying some test patterns, as well as some Tesla-themed content. It really brings the construction site to life - and it's the clearest sign that the Diner is well on its way to completion.
We’re hoping that this first Tesla Diner sees plenty of success - and that Tesla begins opening more of these types of facilities throughout North America, and eventually globally. Given Tesla’s penchant for unique Superchargers, we imagine this could truly be the case one day.
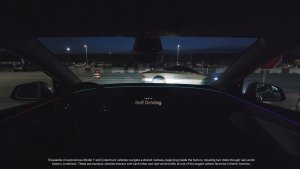
As Tesla continues to push the capabilities of its hardware as it prepares for autonomy with FSD Unsupervised, there has been a distinct divergence in features between HW4-equipped vehicles on FSD V13, and HW3-equipped vehicles on FSD V12.6.
There are definitely reasons for this, and Tesla hacker Greentheonly, over on X, went into great detail on some of the reasons why this divergence has continued and is likely to continue.
If you’re interested in some background, we recommend the following articles. Although they’re not necessary, you may enjoy reading them before diving right in if you enjoy this topic.
Back in the summer of 2024, we reported that Tesla’s HW4 had yet to reach its full potential, and that HW3 still had some compute to work with. However, FSD has undergone a rapid evolution - there are now fundamental differences driven by the hardware capabilities and sheer scale of the latest builds of FSD.
FSD V13’s Gargantuan Neural Networks
FSD V13 is a substantial leap for Tesla. It features substantially larger neural networks - the core brain that processes all the environmental data and makes decisions. Those networks are far larger in V13 than in V12, which results in a much smoother and human-like expereience.
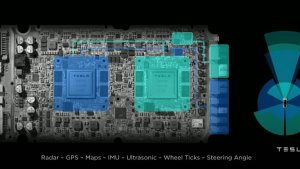
Tesla’s FSD computers contain two nodes. According to Green’s analysis of FSD V13, Node B, which handles the actual end-to-end driving logic, tripled in size from 2.3 GB in V12 to a staggering 7.5 GB in V13. That’s a substantial increase, and one of the main reasons why HW3 can’t handle FSD V13. While Interestingly, Node A on HW4 remains similar in size to FSD V12, using up about 2.3 GB.
However, this massive size is also pushing the limits of HW4. While this isn’t necessarily a big problem immediately - at the end of the day, there is a limited amount of compute and ram available and model sizes will likely grow in the future. In fact, Tesla is planning to scale model sizes in the next FSD version and has already said they’ll need to optimize them, as context size is limited by on-board memory.
HW3 Limitations
Since HW3 can’t run the latest FSD models, where does this leave millions of Tesla vehicles equipped with the now-legacy FSD hardware? Are they hitting a dead end? Not exactly - Tesla has promised to replace HW3 computers with new units during the Q4 2024 Earnings Call, but only for those who have purchased FSD and only if Tesla is no longer able to update HW3 vehicles.
There’s no doubt Tesla hopes to achieve autonomy and then work backwards to make it compatible with HW3, but that’s unlikely to happen with the limited ram available on HW3.
Tesla’s AI team has continued to say that they’re still working on updating HW3 vehicles - but that they will be taking a backburner to updates for HW4 until the team can optimize the model efficiently enough to run on the smaller footprint. That means V12.6 isn’t just V13 “lite” - it is a distinctly different software branch tailored specifically for HW3’s capabilities.
Green's analysis showed that HW3 under V12.6 runs NNs totaling 1.2 GB on Node A and 3.1 GB on Node B, which is significantly smaller than the footprint of V13. Back in November, we discussed how Tesla is running a smaller and optimized FSD model on HW3, with the specific goal of achieving similar performance to V13. FSD V12.6 appears to be the current implementation of that smaller model strategy.
Green also found that of the total neural nets used for FSD, 135 are shared between the current V12.6 and FSD V13.2 releases, which is the result of Tesla’s AI team working to optimize and refine the V13 model for HW3. So some neural nets are shared between the two sets of hardware, while others are specific to HW3 or HW4.
AI4 in the Future
The fact that V13 is already stretching HW4’s limits makes us wonder about Tesla’s imminent release of AI5. Last year, Tesla mentioned that AI5 would be 18 months away - which is now about 8 months away, and potentially even sooner to help solve the autonomy problem.
At the same time, Tesla is looking to launch Unsupervised FSD in June in Austin, Texas, with presumably HW4, which would indicate that they’re confident in its capabilities.
Unless Tesla launches the Robotaxi network with AI5, we don’t believe AI5 will be a “must have” item. Undoubtedly, it will result in similar improvements to HW4 compared to HW3. However, the software needed to take advantage of the newer hardware could still be years away.
All eyes will be on Tesla’s Robotaxi network launch and the hardware required for it. For now, HW4 owners are in good hands with future updates are on the horizon, and we’re certainly excited for what’s next.


![Tesla’s Hollywood Diner: In-Car Controls & Theater Screens Turned On [VIDEO]](https://www.notateslaapp.com/img/containers/article_images/2025/tesla-diner.webp/3aaa2ea0edf2eaa0fabe1217530f3476/tesla-diner.jpg)
![Tesla's Hidden 'Elon Mode' Unveiled: A Sneak Peek into the Future of FSD [Video]](https://www.notateslaapp.com/images/news/2022/fsd-beta-inside_300w.jpg)
![Tesla’s Missing Voice: Why a PR Team Matters More Than Ever [Opinion]](https://www.notateslaapp.com/img/containers/article_images/multiple-models/group_93.jpg/4e1056961f0480c7b9eff43dd2ec288e/group_93.jpg)
![Andrej Karpathy considers returning to Tesla to work on Optimus [video]](https://www.notateslaapp.com/images/news/2022/karpathy-podcast_300w.jpg)